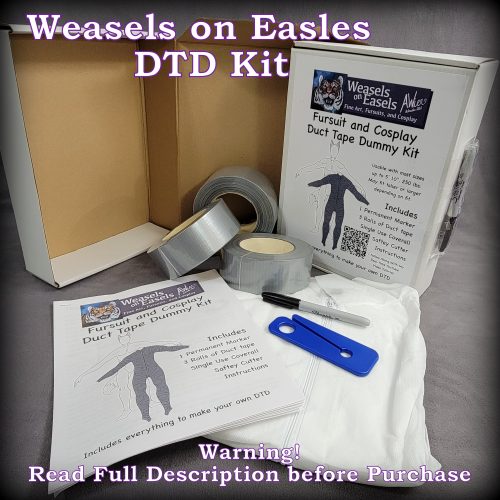
Save time with on of our kits!
Download the PDF version of our tutorial here:
![]()
This page is a work in progress but here is a downloadable version for you. Do not copy, redistribute or otherwise sell my tutorial. It is free for personal use and for making your DTD for your fursuit maker only. If others ask for it please send them here to obtain it themselves. Thank you!
Here’s our DTD Tutorial Video From YouTube!
Click through the images below to view the individual pages at full size. Pictures on the rest of this page are coming soon.
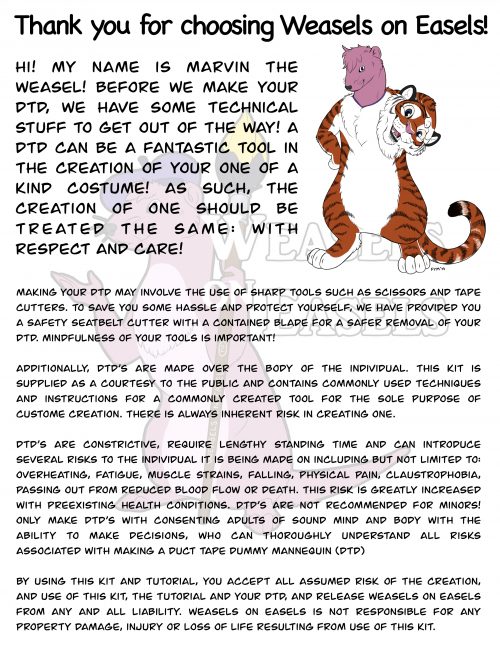

Thank you for choosing Weasels on Easels!
Hi! My name is Marvin the Weasel Before we make your DTD, we have some technical stuff to get out of the way! A DTD can be a fantastic tool in the creation of your one of a kind costume! As such, the creation of one should be treated with the same: with respect and care!

Making your DTD may involve the use of sharp tools such as scissors and tape cutters. If you have purchased our DTD Kit; to save you some hassle and protect yourself, we have provided you a safety seatbelt cutter with a contained blade for a safer removal of your DTD. MINDFULLNESS OF YOUR TOOLS IS IMPORTANT!
Additionally, DTDs are made over the body of the individual. THIS KIT IS SUPPLIED AS A COURTESY TO THE PUBLIC AND CONTAINS COMMONLY USED TECHNIQUES AND INSTRUCTIONS FOR A COMMONLY CREATED TOOL FOR THE SOLE PURPOSE OF COSTUME CREATION. THERE IS ALWAYS INHERENT RISK IN CREATING ONE.
DTDs ARE CONSTRICTIVE, REQUIRE LENGTHY STANDING TIME AND CAN INTRODUCE SEVERAL RISKS TO THE INDIVIDUAL IT IS BEING MADE ON, INCLUDING BUT NOT LIMITED TO: OVERHEATING, FATIGUE, MUSCLE STRAINS, FALLING, PHYSICAL PAIN, CLAUSTROPHOBIA, PASSING OUT FROM REDUCED BLOOD FLOW OR DEATH. THIS RISK IS GREATLY INCREASED WITH PREEXISTING HEALTH CONDITIONS. DTDs ARE NOT RECOMMENDED FOR MINORS! ONLY MAKE DTDs WITH CONSENTING ADULTS OF SOUND MIND AND BODY WITH THE ABILITY TO MAKE DECISIONS, WHO CAN THOROUGHLY UNDERSTAND ALL RISKS ASSOCIATED WITH MAKING A DUCT TAPE DUMMY MANNEQUIN (DTD)
BY USING THIS KIT AND TUTORIAL, YOU ACCEPT ALL ASSUMED RISK OF THE CREATION, AND USE OF THIS KIT, THE TUTORIAL AND YOUR DTD, AND RELEASE WEASELS ON EASELS FROM ANY AND ALL LIABILITY. WEASELS ON EASELS IS NOT RESPONSIBLE FOR ANY PROPERTY DAMAGE, INJURY OR LOSS OF LIFE RESULTING FROM USE OF THIS KIT.
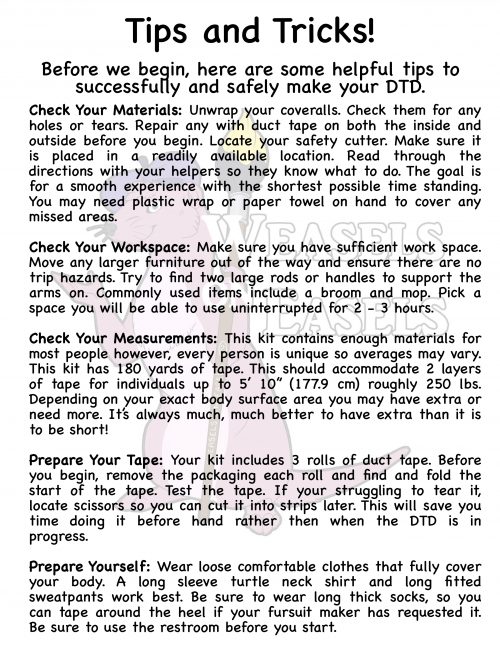
Tips and Tricks!
Before we begin, here are some helpful tips to successfully and safely make your DTD.
To Begin you will need 2-3 large rolls of decent quality duct tape (this really matters!), scissors, a safety seat belt cutter (optional but highly recommended), a set of disposable painters coveralls, some good friends and some comfortable, long sleeve, fully covering clothes you don’t mind possibly cutting a bit.
Check Your Materials: Unwrap your coveralls. Check them for any holes or tears. Repair any with duct tape on both the inside and outside before you begin. Locate your safety cutter. Make sure it is placed in a readily available location. Read through the directions with your helpers so they know what to do. The goal is for a smooth experience with the shortest possible time standing. You may need plastic wrap or paper towel on hand to cover any missed areas.
Check Your Workspace: Make sure you have sufficient work space. Move any larger furniture out of the way and ensure there are no trip hazards. Try to find two large rods or handles to support the arms on. Commonly used items include a broom and mop. Pick a space you will be able to use uninterrupted for 2 – 3 hours.
Check Your Measurements: Most DTD’s need 2-3 large rolls of tape, although, every person is unique so averages may vary. Our standard kit has 180 yards of tape. This should accommodate 2 layers of tape for individuals up to 5′ 10” (177.9 cm), roughly 250 lbs. Depending on your exact body surface area you may have extra or need more. It’s always much, much better to have extra than it is to be short! Purchase more rolls then you think you’ll need because you can always find a use if you have extra.
Prepare Your Tape: Before you begin, remove the packaging each roll and find and fold the start of the tape. Test the tape. If your struggling to tear it, locate scissors so you can cut it into strips later. This will save you time doing it before hand rather then when the OTO is in progress.
Prepare Yourself: Wear loose comfortable clothes that fully cover your body. A long sleeve turtle neck shirt and long fitted sweatpants work best. Be sure to wear long thick socks, so you can tape around the heel if your fursuit maker has requested it. Be sure to use the restroom before you start.
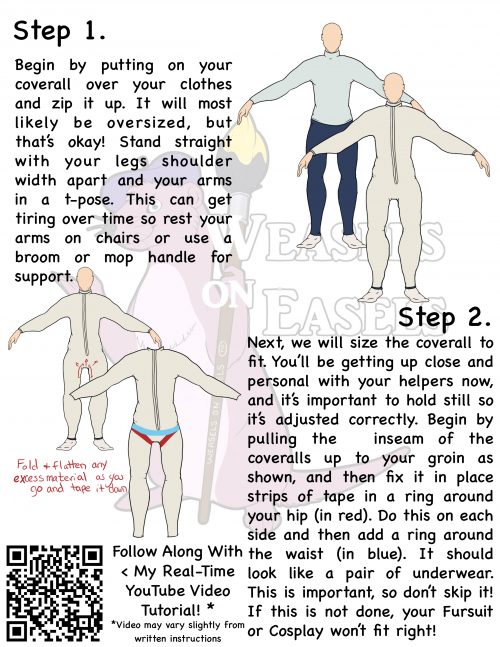
Step 1.
Begin by putting on your coverall over your clothes and zip it up. It will most likely be oversized, but that’s okay! Stand straight with your legs shoulder width apart and your arms in a t-pose. This can get tiring over time so rest your arms on chairs or use a broom or mop handle for support.


Step 2.
Next, we will size the coverall to fit. You’ll be getting up close and personal with your helpers now, and its important to hold still so its adjusted correctly. Begin by pulling the inseam of the coveralls up to your groin as shown, and then fix it in place strips of tape in a ring around your hip (in red). Do this on each side and then add a ring around Follow Along With the waist (in blue). It should look like a pair of underwear. This is important, so don’t skip it! If this is not done, your Fursuit or Cosplay won’t fit right!
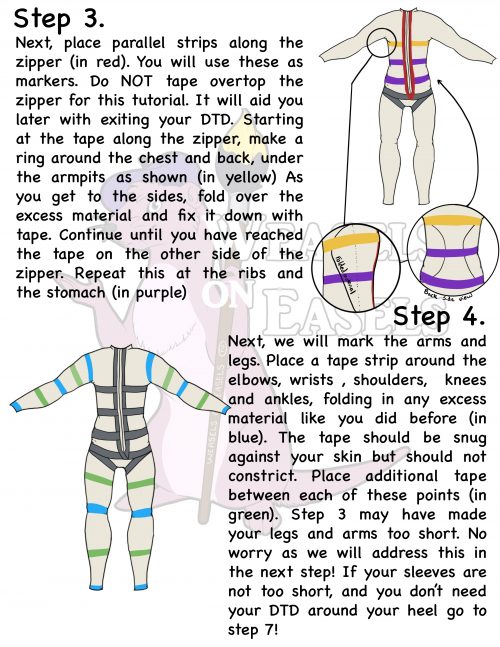
Step 3.
Next, place parallel strips along the zipper (in red). You will use these as markers. Do NOT tape overtop the zipper for this tutorial. It will aid you later with exiting your DTD. Starting at the tape along the zipper, make a ring around the chest and back, under the armpits as shown (in yellow) As you get to the sides, fold over the excess material and fix it clown with tape. Continue until you have reached the tape on the other side of the zipper. Repeat this at the ribs and the stomach (in purple)


Step 4.
Next, we marl< the arms and legs. Place a tape strip around the el bows, wrists , shoulders, knees and ankles, folding in any excess material like you did before (in blue). The tape should be snug against your skin but should not constrict. Place additional tape between each of these points (in green). Step 3 may have made your legs and arms too short. No worry as we will address this in the next step! If your sleeves are not too short and you don’t need your DTD around your heel go to step 7!
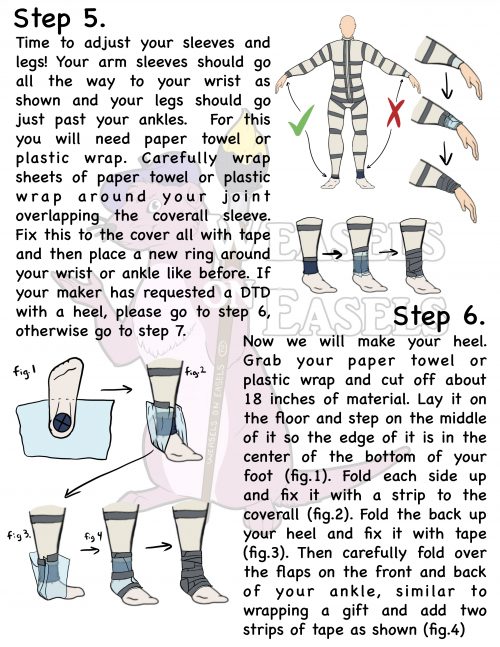
Step 5.
Time to adjust your sleeves and legs! Your arm sleeves should go all the way to your wrist as shown and your legs should go just past your ankles. For this you will need paper towel or plastic wrap. Carefully wrap sheets of paper towel or plastic wrap around your joint overlapping the coverall sleeve. Fix this to the cover all with tape and then place a new ring around your wrist or ankle like before. If your maker has requested a DTD with a heel, please go to step 6, otherwise go to step 7.


Step 6.
Now we will malke your heel. Grab your paper towel or plastic wrap and cut off about 18 inches of material. Lay it on the floor and step on the middle of it so the edge of it is in the center of the bottom of your foot (fig. 1). Fold each side up and fix it with a strip to the coverall (fig. 2.). Fold the back up your heel and fix it with tape (fig.3). Then carefully fold over the flaps on the front and back of your ankle, similar to wrapping a gift and add two strips of tape as shown ( fig.4)
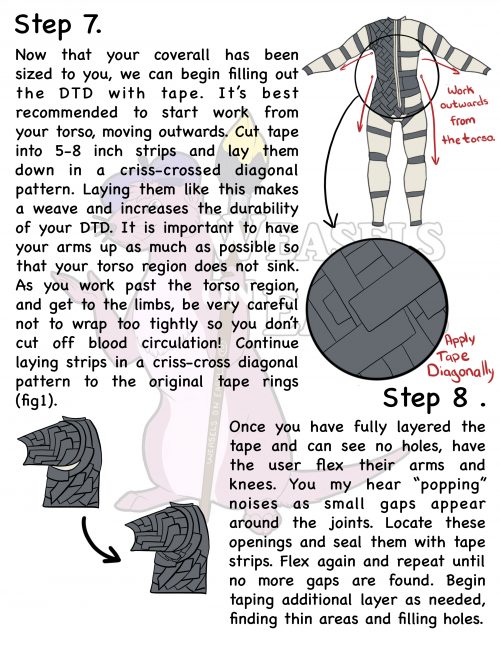
Step 7.
Now that your coverall has been sized to you, we can begin filling out the DTD with tape. It’s best recommended to start work from your torso, moving outwards. Cut tape into 5-8 inch strips and lay them down in a criss-crossed diagonal pattern. Laying them like this makes a weave and increases the durability of your DTD. It is important to have your arms up as much as possible so that your torso region does not sink. As you work past the torso region, and get to the limbs, be very careful not to wrap too tightly so you don’t cut off blood circulation! Continue laying strips in a criss-cross diagonal pattern to the original tape rings


Step 8.
Once you have fully layered the tape and can see no holes, have the user flex their arms and knees. You my near ”popping” noises as small gaps appear around the joints. Locate these openings and seal them with tape strips. Flex again and repeat until no more gaps are found. Begin taping additional layer as needed, finding thin areas and filling holes.
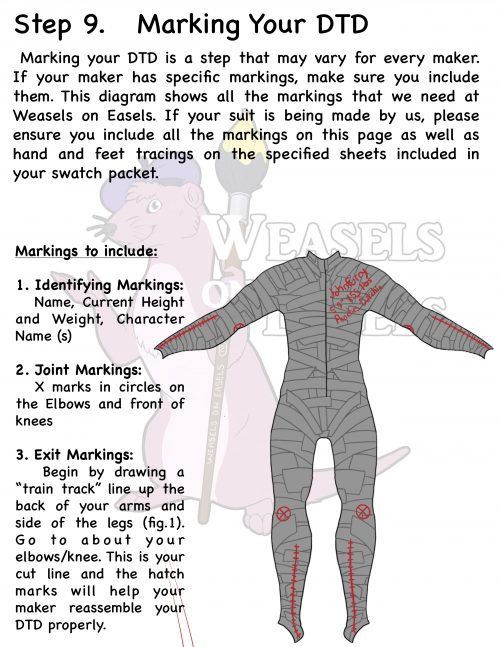
Step 9. Marking Your DTD
Marking your DTD is a step that may vary for every maker. If your maker has specific markings, make sure you include them. This diagram shows all the markings that we need at Weasels on Easels. If your suit is being made by us, please ensure you include all the markings on this page as well as hand and feet tracings on the specified sheets included in your swatch packet.
Markings to include:
1. Identifying Markings:
Name, Current Height and Weight, Character Name (s)
2. Joint Markings:
X marks in circles on the Elbows and front of knees
3. Exit Markings:
Begin by drawing a “train track” line up the back of your arms and side of the legs ( fig.1 ). Go to about your elbows/knees. This is your cut line and the hash marks will help your maker reassemble your DTD properly.

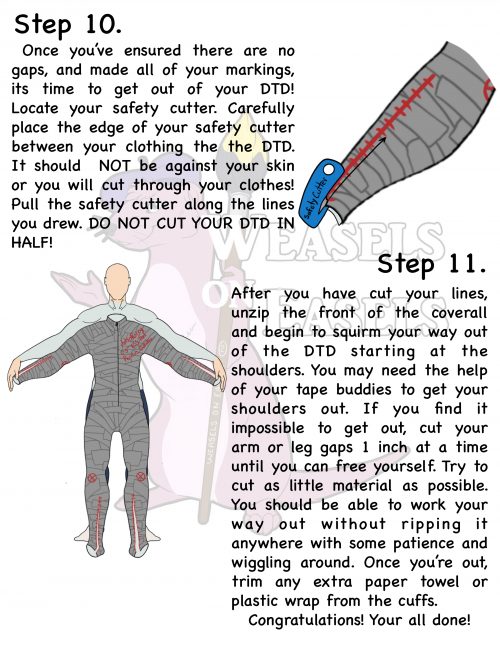
Step 10.
Once you’ve ensured there are no gaps, and made all of your markings, its time to get out of your DTD! Locate your safety cutter. Carefully place the edge of your safety cutter between your clothing the the DTO. It should NOI be against your skin or you will cut through your clothes! Pull the safety cutter along the lines you drew. DO NOT CUT YOUR DTD IN HALF!


Step 11.
After you have your lines, unzip the front of the coverall and begin to squirm your way out of the DTD starting at the shoulders. You may need the help of your tape buddies to get your shoulders out. If you find it impossible to get out, cut your arm or leg gaps 1 inch at a time until you can free Yourself. Try to cut as little material as possible. You should be able to work your way out without ripping it anywhere with some patience and wiggling around. Once you’re out, trim any extra paper towel or plastic wrap from the cuffs.
Congratulations! Your all done!
Thank you so much for using our DTD Tutorial and supporting our
work!
Enjoy my work, kits, patterns & tutorials?
Check out my Etsy for more: www.etsy.com/shop/weaselsoneasels
Consider Throwing us a Bone on Ko-fi, Patreon or BuyMeACoffee!
Follow us on your favorite social media sites!
@Weaselsoneasels on Twitter, Facebook, Instagram, YouTube, Twitch, DeviantArt, Weasyl, FurAffinity, Sofurry and more!
Questions? Comments? Find a typo or something we missed?
Let us know! Contact us at:
Customerservice@weaselsoneasels.com